Tuesday, January 20, 2015

Evaluate 3.1.2 Self-Reflection on Teaching Abilities

This blog is a culmination of all that I've learned as part of the GAVS #eTeacherTOOL Training.  The final step toward my Pursuit of a Classroom in the Cloud is to showcase my teaching abilities within the lens of the virtual classroom.

Looking back over my eight years of teaching in a brick-&-mortar classroom I am grateful for the opportunities I've had to develop my craft and to share with my colleagues in the process.  To expand and enrich my own professional development, I have given number of professional presentations that focus on my passion for tech integration to better engage our 21st Century students.  I am also thankful that I have been on the front end of the EdTech Revolution and have wholeheartedly embraced technology as an indispensable part of my classroom.


In my own #6wordmemoir I express that I was born to teach, live for creativity.  I believe this is at the heart of my teaching as I was always drawn to the profession (even as a little girl) and have a passion for presenting my content in an innovative way.  I am appreciative that my teaching and creativity was recognized in 2013 as I was named the Eastside Social Studies Department Teacher of the Year and in 2012 as a Snapping Shoals Grant Winner for my flipped classroom initiative: Bringing the History Classroom into the 21st Century.


The greatest indicators of my abilities as a virtual teacher are in my digital interactions with students.  Not only do I utilize numerous EdTech tools in my classroom on a regular basis- remind, signupgenius.com, and google sites to name a few- but I am confident in my ability to create engaging digital artifacts and to interact with my students in an online setting.


In all, I am excited about opening a new door in my teaching career as I pursue my own classroom in the cloud.  It is my sincerest hope that I can continue to live out my #6word memoir within the virtual community of GAVS.  Born to teach, live for creativity.

Monday, January 19, 2015

Evaluate 3.1.1 Differentiation


In my previous post on The Summative Assessment, I outlined my APUSH Mock Exams as a means to evaluate student learning.  Below is a pie chart that illustrates student performance on the most recent Mock Exam.  Fourteen students scored in the "A" range, 26 students in the "B" range, 19 in the "C" range, and 4 student in the "F" range.  The average score on this assessment was an 80.  Of my 63 APUSH students, 48 of those students are identified as Gifted & Talented.  Finally, with no students this year having IEP's or 504 Modifications, so no testing accommodations were necessary.


This particular Mock Exam included three sections: multiple choice questions, short answer questions, and a long essay question.   On the individual level, I utilized this data to identify students for remediation and small group sessions that focus on specific skills- ie: thesis paragraph development and focused multiple choice practice.  While these focused learning paths are more appropriate for students struggling with certain skills, all students benefit from our whole group debrief of the exam data, including item analysis and corrections.

Moving forward, it is expected that students continue to show improvement in their mock exam score based on the individual and whole group feedback provided.  High caliber work and exam scores are an expectation of a college level AP course and students understand this expectation when they sign up for the class.  Students also appreciate that the Mock Exams are prognostic of their performance on the National AP Exam in May and maximize the data and differentiated feedback to their advantage.

Evaluate 2.1.2 Rubrics & Competencies


Competency based learning is a method that allows for student flexibility and for integration of technology rich assignments.  Rather than students waiting on the teacher's pacing, competency education encourages students to move at their own pace and to advance upon mastery.  In this model, teachers become guides and facilitators of content rather than the deliverer of lectures.

To illustrate the Competency Learning Structure within the e-learning setting, I created the example below for an 11th Grade US History course:

GPS SSUSH11: The student will describe the economic, social, and geographic impact of the growth of big business and technological innovations after Reconstruction. 

  • Explain the impact of the railroads on other industries, such as steel, and on the organization of big business
  • Describe the impact of the railroads in the development of the West; include the transcontinental railroad, and the use of Chinese labor.
    • Construct a Webb Diagram or Mind Map that outlines the impact of railroads on the expansion of the economy and society
  • Identify John D. Rockefeller and the Standard Oil Company and the rise of trusts and monopolies
    • Create a 'Flesh it Out' graphic for John D. Rockefeller
  • Describe the inventions of Thomas Edison; include the electric light bulb, motion pictures, and the phonograph, and their impact on American life
    •  Current Event Analysis Paper that describes and connects the impact of ONE of Thomas Edison's inventions on American life.

Commentary:
Because US History is an EOC course, I designed my competency structure based on the Georgia Performance Standards.  Students would work through a variety of assignments and tasks to master the competency requirements of this particular standard.  At the end of the competency, students would then take a test that incorporates both multiple choice and constructed response elements in preparation for the EOC.

Included in the structure sample above are assignments students can complete to show mastery of the competency and its associated learning objectives.  An alternative means to attain this competency is through the use of a Choice Board.  For example, a Menu Board or Think-Tac-Toe would be a great method for incorporating student choice and differentiation as part of the competency based learning model.

Evaluate 2.1.1 Data Driven Instruction, Analytics, & Reporting Tools


In the last few years I have served as both the US History Content Leader (an ambassador-like position between our BOE and my school) and the Social Studies Department Chair.  In both capacities, I have been very involved in reviewing and reporting data as a means to drive instruction at the classroom, school, and district levels.  In a virtual setting, my background in analytics would serve as a good foundation to the vast amounts of information available for each student within an LMS & Student Information System.

[Image Source]

Below are three descriptions of how reporting tools and analytics could assist virtual teachers as they practice data driven instruction.

Enrollments & Attendance
An important element in data driven instruction is the use of reporting tools for communication purposes.  In the online classroom, communication goes both ways.  First, some reporting tools communicate to the teacher the enrollment information and gives a snapshot of who is "attending" and how they performing.  Second, virtual teachers must utilize this data to contact students and parents as part of ongoing communication in order to encourage academic growth.

Monitoring Course Progress with Observational Data & Analytics
It is paramount that virtual teachers use the observational data tools frequently in order to properly monitor a student's progress within the course.  When considering why a student is not performing well in an online course, this is a great place to start.  Similar to when I used Moodle in my own classroom, I could easily distinguish the students who performed well in the course because they were the same students who spent the most time working through the resources and materials placed on the website.  This information is extremely effective when communicated to stakeholders.

Students Monitoring Their Own Learning
The e-learning setting encourages students to become an autonomous learners in many ways: from the acquisition of information through asynchronous assignments to the access of data tools for progress monitoring.  In order for a student to become a successful self-monitor, the virtual teacher must communicate this expectation as paramount to student success and must also provide quality feedback for students to reflect on.

Evaluate 1.1.3 The Summative Assessment

The goal of a summative assessment is to evaluate student learning at the end of a curricular unit by comparing it against a standard or benchmark.  In my on-level US History class, this translates to a series of 3-4 district level benchmark exams and the state-mandated End of Course exam.  Comparatively, my AP US History students must take the EOC, but also have the opportunity to take the National Exam in May.

Thus, the goal of creating summative assessments in my own classroom is to design authentic tests that mimic very closely the EOC and National APUSH Exams.  Making my classroom assessment as similar to the design and parameters of these two exams proves their validity and relevancy.  Further, to maintain their reliability it is essential to review testing data and to consider each assessment as organic- constantly being analyzed and improved to ensure accurate summation of learning.

While the first two factors in summative assessments- validity and reliability- apply equally to both brick-and-mortar and virtual teachers, the final factor highlights a stark difference.  In the e-learning settings, security takes especially careful thought from the virtual teacher. For my own APUSH classroom in the cloud, I would employ three basic practices to maintain security:
  1. Establish a very strict time limit that mocks the AP Exam:  55 Multiple Choice Questions in 60 minutes, 4 Short Answer Questions in 40 minutes, 1 Long Essay Question in about 35 minutes, and 1 Document Based Question in 60 minutes.  Note: I would NOT give a 3 hour mock exam in one online sitting.  Instead I would use the time parameters listed above as guidelines.  For example, a 25 multiple choice exam with 2 short answer questions would take students no more than 50 minutes to complete.
  2. Draw from an extensive test bank and give multiple forms of the exam.
  3. Display one question per page with limited opportunities to go back to previous questions, maybe even breaking the exam into a few sections.
To maintain my own classroom test integrity, I have opted out of posting sample questions from my own summative exams.  However, to showcase the types of questions that I use to create my assessments, please follow the link below to College Board's Released APUSH Exam: http://media.collegeboard.com/digitalServices/pdf/ap/ap-us-history-practice-exam.pdf

Evaluate 1.1.2 Quality Feedback

To show the expectations of quality feedback, I've linked a document I created at the beginning of the school year to discuss with my APUSH students the process of writing Short Answer Questions. 

As a summative assessment, students wrote a series of two Short Answer Questions.  After grading and providing individual feedback, including both areas of strength and weaknesses, I created this document.  The purpose of the document was to provide student samples that meet and exceed the S.A.Q. expectations.  By providing students with individual and class feedback, I was better able to clearly communicate specific steps that students can take in order to continue to improve their APUSH writing skills.

Although this example of feedback was based on an assessment conducted in a brick-and-mortar classroom (hence the hand-written responses), I would definitely use the same process in a virtual classroom.


 Follow this link to see the entire Short Answer Debrief on Google Drive: 

Evaluate 1.1.1 Formative Assessment

Every teacher, whether brick-and-mortar or virtual, should provide opportunities for pre-assessment as a means to identify students' prior knowledge.  There are many options to pre-assess student readiness but my favorite method is a quick mind-mapping or brainstorming session.

Once the pre-assessment has been conducted, teachers must develop instruction and assessment that takes into account diverse student needs and learning styles.  For virtual teachers in particular, this means creating engaging instructional experiences that incorporate formative assessments for every 20-30 minutes of student work time.  Thus, varying the methods of assessment is crucial element in online instruction.

To demonstrate the need for varied formative assessments, I created the three examples below based on the Civil War unit I've been developing over the course of my previous posts.  The topic of focus is Abraham Lincoln's life, role in the Civil War, and legacy.  The assessments below are designed to fit into an AP US History course but could easily be adapted for an on-level course, too.

1. Lincoln Logs: Framing the Lincoln Narrative
After viewing several video narratives of Lincoln's life, students will complete a RAFT Activity in which they must contextualize his role in the Civil War.

ROLE: Digital Museum Curator
AUDIENCE: Civil War Enthusiast
FORMAT: 3 minute, mini-podcast via morphbox, AudioBoo, Vocaroo or another digital recording app
TOPIC: Abraham Lincoln's Role in the Civil War


2. The Lincoln Collection: Document Analysis
Students will participate in a close reading of four writings/speeches of Lincoln.  After reading excerpts from the documents listed below, students will complete a graphic organizer in which they "talk back" to the text.  In this process, students will annotate in a double entry journal format and will consider audience, purpose, tone, and rhetorical devices.

Excerpts will be taken from the following documents:
  • First Inaugural Address
  • Gettysburg Address
  • Emancipation Proclamation
  • Second Inaugural Address

3. Lincoln Memes: Defining His Legacy
Students will be provided with four images in which they must create a meme illustrating Lincoln's legacy.  Students may choose a quote that they believe best encapsulates Lincoln's legacy or may create their own understanding of his legacy (see samples below).  Students will also be given a list of online meme generators/makers and a rubric.

Sunday, January 18, 2015

Create 4.1.3 Aggregating Lesson Material

For virtual teachers wishing to aggregate and present learning objects and materials, an e-learning authoring tool is a good choice.  Below are three such tools:

No. 1: Easy Generator
The free option for this e-learning builder allows a user to create up to 10 websites.  It's features include interactive multimedia capacities, extremely easy editing, and templates that promise to enhance the instructional and graphic design of your course.


No. 2: Course Sites
Powered and supported by BlackBoard, this website allows a user to create up to 5 customized websites for free.  The most impressive  features include the ability to publish your site as an Open Educational Resource under Creative Commons and build multimedia mash-ups from around the web.


No. 3: Smart Builder
In my research and investigation of e-learning authoring tools, Smart Builder looks like the most fun.  With a free account a teacher can create an unlimited number of lessons and can also take advantage of the object library, numerous authoring tools, and customizable templates... or can even start from scratch!

Create 4.1.2 Principles of Building Portable Learning Objects


Continuing with the Civil War topic from my previous posts, I created two Portable Learning Objects.

No. 1
I built the module below using blendspace, one of the tools I showcased in my previous post- Define and Explain Learning Objects.  This particular learning object would be utilized within a larger unit study of the Civil War and focuses specifically on comparing the Northern and Southern military strategies.


No. 2
My second learning object was created using Quizlet.  I love the simplicity, the quality, and the interactivity of Quizlet.  I would encourage students to use the flashcards and games to help them study independently, but would also incorporate them into other learning objects like I did in the blendspace module above.

Create 4.1.1 Define & Explain Learning Object Authoring Tools


If the LMS is the skeleton of a digital course, then Learning Objects are the meat.  Serving multiple purposes as both stand alone activities or as part of a curricular unit, learning objects are what virtual teachers create in order to make content engaging and relevant for their students.  Below are five tools that educators can use to build interactive learning objects.

[Image Source]


Free Tools

1. Quizlet is a tried-and-true website that allows users to create digital flashcards.  Flashcard sets can also be studied using different modes and games.  And the best part... all the different study modes can be embedded onto your website!

2. Blendspace is a great option for building learning objects quickly and easily.  I am particularly drawn to the platform's functionality as a place to curate web resources, to assess student learning, and to monitor student progress in real time.  As a free site, this is a great addition to a virtual teacher's tech toolbox.

3. TEDEd is a super easy tool for building super engaging learning objects!  Whether you want to use a lesson that has already been created or if you want to customize your own lesson, students will appreciate the interesting content and interactive platform.

Fee/Subscription Based Tools

4. Smore is a website that I've used a lot in my own classroom and I've even showcased it as part of this blog!  I love smore as a way to build learning objects because you can incorporate text, images, video, forms, and links to other websites.  The finished product is a well-organized and beautiful flyer that translates nicely across all devices and computers.  The downside- with one email address you can only make six flyers for free.  However, with an annual fee (that is extremely discounted for educators, I might add) you can create unlimited flyers with awesome customized features!

5. Online Quiz Creator is an online quiz/trivia generator that promises to make learning content fun, engaging, and meaningfully addictive.  With trivia apps and games so popular among our teenagers today, I really like how this online quiz platform allows teachers to create professional looking quizzes and how its interface is built like a trivia challenge. With the free "Tiny Owl" account, teachers can create unlimited quizzes (15 questions per quiz) but with an upgraded "Teacher Owl" account, the features seem to good to pass up- unlimited quizzes, tests, and assessments with analytics!

Saturday, January 17, 2015

Create 3.1.3 Locating Resources

In my previous post on Creating a Content Map I chose the Civil War as my topic.  Below are three examples of resources I located that could be incorporated into a study of the Civil War in an online classroom.  I've also provided examples of attribution in order to adhere to proper Fair Use and the TEACH Act guidelines.

Image Sample:

"Scott's Great Snake" by moosevlt is licensed under CC by 2.0

Text Sample:

Only one day after their victory at Gettysburg, Union forces captured Vicksburg, the last Confederate stronghold on the Mississippi River. Lincoln and Union commanders began to make plans for finishing the war.

The Union strategy to win the war did not emerge all at once. By 1863, however, the Northern military plan consisted of five major goals:
  1. Fully blockade all Southern coasts. This strategy, known as the Anaconda Plan, would eliminate the possibility of Confederate help from abroad.
  2. Control the Mississippi River. The river was the South's major inland waterway. Also, Northern control of the rivers would separate Texas, Louisiana, and Arkansas from the other Confederate states.
  3. Capture Richmond. Without its capital, the Confederacy's command lines would be disrupted.
  4. Shatter Southern civilian morale by capturing and destroying Atlanta, Savannah, and the heart of Southern secession, South Carolina.
  5. Use the numerical advantage of Northern troops to engage the enemy everywhere to break the spirits of the Confederate Army.
By early 1864, the first two goals had been accomplished. The blockade had successfully prevented any meaningful foreign aid. General Ulysses Grant's success at Vicksburg delivered the Mississippi River to the Union. Lincoln turned to Grant to finish the job and, in the spring of 1864, appointed Grant to command the entire Union Army.

"Northern Plans to End the War" by ushistory.org by the U.S. History Online Textbook.  Available under a Creative Commons Attribution 4.0 International.

Multimedia Sample:


"MOOC | Civil War Strategies | The Civil War and Reconstruction, 1861-1865 | 2.1.5" by
ColumbiaLearn is licensed under Creative Commons.

Create 3.1.2 Fair Use & the TEACH Act

[Image Source]


Copyright laws are not always "black and white," especially when Fair Use and the TEACH Act are concerned.  Fair Use was originally designed to give structured leniency to educators who utilize copyrighted materials for classroom instruction.  With the advent of virtual schools and flipped classrooms, the TEACH Act further expanded Fair Use to provide opportunities to use materials for educational purposes.

As a virtual teacher, it is important to understand not only the laws of copyright and creative commons, but also the protections provided by Fair Use and the TEACH Act.  A major role of the virtual teacher is to locate and deliver quality content to students in a creative and meaningful way.  In order to carry out this role, it is essential that the virtual teacher uses the most up-to-date resources available, even those under copyright.  By understanding both the law and the protection, a virtual teacher can more confidently and appropriately deliver quality content to her students.

Create 3.1.1 Open Educational Resources & Creative Commons

Open Educational Resources, simply put, are the digital materials that teachers can use, reuse, and modify for classroom use.  These Open Educational Resources are organized under four major Creative Commons licenses.  To make it easy to remember the differences, I created the graphic below.

I design with canva!

Thursday, January 15, 2015

Create 2.1.3 Using Web 2.0 Tools to Differentiate Student Assessment

In my last post on Using Web 2.0 Tools to Differentiate Teacher Instruction I showcased a variety of strategies and web resources to enrich and extend student learning.  One of those strategies focused on creating infographics as a way for students to show depth of knowledge.  One of my favorite Web 2.0 Tools for creating infographics in the classroom is Piktochart, a free [and super easy] website that promises users to help make their information beautiful.


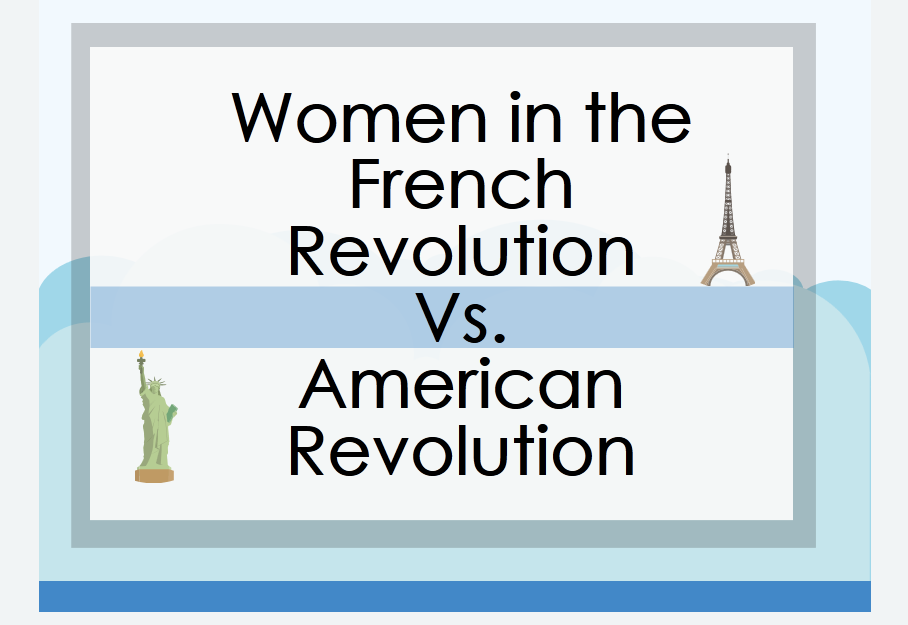
I recently designed a project for my AP European History students, many of whom are also taking AP US History.  To connect the two courses, students were required to visually represent the similarities and differences between the French and American Revolutions.  To differentiate the project, students were given the opportunity to choose the specific topical connection they wished to research and create an artifact for.

To allow for additional student choice I provided a few possible infographic websites for students to explore and Piktochart was hands down the most popular.  After finishing their projects, students then participated in an online symposium in which they shared their own infographics and reflected on their peer's artifacts.

Below are links to student samples from the #APEHconnect project.  Each student sample is used with permission.  Also, check out the links to the project rubric and symposium instructions at the bottom of this post.


https://magic.piktochart.com/output/3358681-apehconnect-war-tech-amfr-rev#

https://magic.piktochart.com/output/3385818-women-in-french-revolution-vs-wo#
https://magic.piktochart.com/output/3358786-revolutions#

 Links to Project Rubric, & Symposium:
#APEHconnect Project Rubric
#APEHconnect Symposium Instructions

Create 2.1.2 Using Web 2.0 Tools to Differentiate Teacher Instruction

Over the summer I presented at the NCSS Secondary Ed Summer Institute on strategies to extend and enrich the needs of all learners.  Aptly titled- Bright But Bored- my presentation focused on differentiation strategies and web tools that teachers could use to bring their classrooms the 21st century.

Included in my presentation were Web 2.0 Tools like Today's Meet, Kahoot, and the infographic creation website easel.ly.  My presentation was created using prezi and I implemented many of my student's work samples.  The final product was itself a differentiated instructional tool shared with teachers to help them differentiate their own instruction.


Creat 2.1.1 Web Tools

Last summer I presented at our school system's Ed Tech Conference with my good friend and colleague, @MrsAshRick.  Our presentation was titled- Tech Toolbox 2.0- and our intent was to showcase some of our favorite web tools for teachers to use in their classrooms.  We organized our tools into three categories: Classroom Management Tools, Collaboration Tools, and Creativity Tools.

Each of the tools highlighted in the presentation are free and are meant to enhance classroom instruction while making classroom procedures and the implementation of technology more efficient.  Although the presentation was directed at an audience of brick-and-mortar teachers, there are numerous tools that a virtual teacher could easily utilize, too.


Create 1.1.3 Appearance

Beauty may be in the eye if the beholder, however sound design for instructional sites must adhere to two basic rules: image rich and well organized.  As someone who has a personal passion for graphic design, this appearance quest was right up my alley.  Below I've outlined 10 sites, five of which have excellent aesthetics and design and five of which do not. 

*Note: All images are screenshots from their respective sites.

The Good
1. Khan Academy

Streamlined, easy navigation, and awesome organization... Khan Academy is a site with excellent design!  I also love that they are a non-profit and promise in their mission statement to remain an ad-free and subscription-free site.


2. UShistory.org

It's beautifully designed and it's resources are all about US History...It just doesn't get any better than that!  Although the homepage is a little busy, the graphics and easy navigation make up for it.  At first glance I am intrigued by the graphics and want to further explore their resources.  In short, this site immediately drew me in.


3. Digital History

Awesome organization and super easy navigation make this one of my go-to sites for US History! Organized by eras, topics, resources, and references- the site also has an interactive, visual timeline on the homepage for navigation.  Pretty cool!


4. TEDEd

I am a huge fan of TED Talks and TEDEd is just as amazing!  Their videos are engaging and their website is impressive.  The overall design is appealing and draws the visitor into its vast repertoire of video and lesson resources.


5. Free Rice

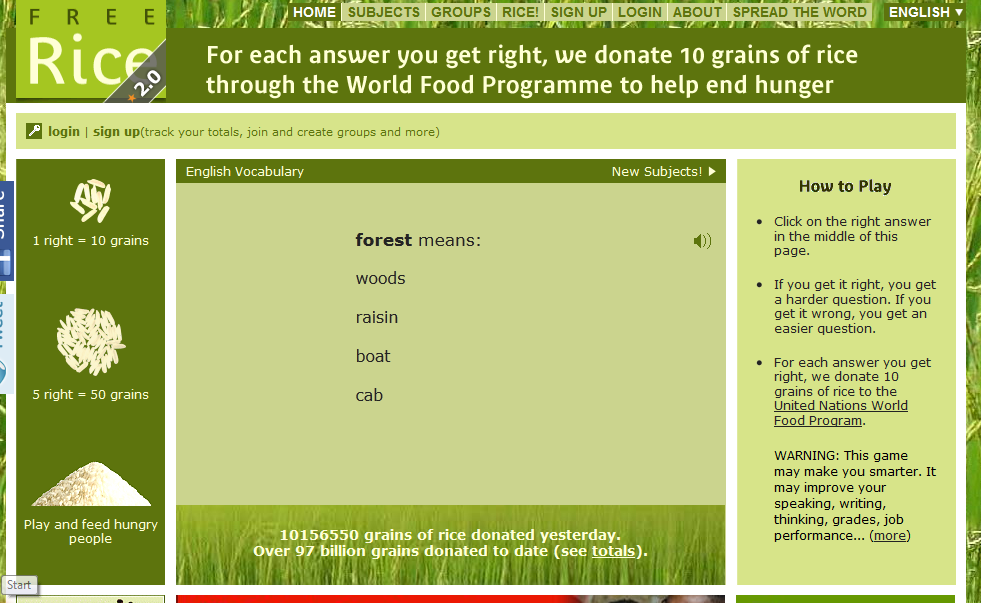
I love the design and purpose of this site!  Not only is it geared to help educate people around the world, but for every vocabulary word you get right the company will donate 10 grains of rice to the UN's World Food Program.  Interactive and engaging, this site gets it right!


The Not-so-Good

1. Shmoop

While I love shmoop for their amazing study resources, I do not like their platform.  It is too busy, overwhelming, and saturated with outside ads.


2. Hippo Campus

HippoCampus is another site that I love for their resources and easy navigation but the videos are not very exciting.  Also, the color and design is too dull and boring for students.


3. Discovery Education Homework Helper

At first glance, this website has a lot going on.  I felt overwhelmed and after digging deeper into the resources was underwhelmed with what they offered students for social studies help.


 4. The History Place


This website may have great resources but the colors are too bright and the design is very unprofessional compared to other sites I've seen. 


5. Homework Spot

Similar to The History Place, the colors and design are too bright and the site too undeveloped.  But the site does offer a ton of resources and links to higher quality websites.

Wednesday, January 14, 2015

Create 1.1.2 Creating a Content map

Content maps are a great way to organize important information and images relating to a topic of study.  I especially like content maps because they are a visual representation of the planning process... the perfect combination for my detail-oriented, graphic design-loving personality!  

Below is the content map I created for the current unit we are studying in APUSH- The Civil War.  As with any war, I break down my lessons and activities based on the causes, course, and consequences.  This content map in particular illustrates the most important topics discussed in my own class as part of our Civil War unit.

Tuesday, January 13, 2015

Create 1.1.1 Time Management

[Image Source]

If time is of the essence, then the management of that time is essential.  As someone with a sound work ethic and a Type A personality, time management and productivity is important to me.  While I have adopted a number of time management practices over the years, I am always looking for the next great tool to help me be as productive as possible.

Below are 5 Tools for Time Management, all of which are tried & true and have my personal stamp of approval.

1. Old Fashion Pen & Paper To-do List
Although I know there are a large number of apps and websites that are geared toward creating amazing lists, I rely on my hand-written to-do list.  There is nothing more gratifying than marking through a task upon its completion and keeping track of my priorities.  #personal #professional

2. Online Stopwatch
I am very detail-oriented and often times find myself lost in a project for hours.  In order to compensate this habit, especially when I need to manage my time and get things done quickly, I use a timer.  My go-to timer is the built-in clock on my phone; however, I also use online stopwatch in my classroom to help instill time management in my students.  #professional

3. Hootsuite
I like using Hootsuite to manage my personal and professional twitter accounts, as well as the chats that I like to follow/participate in.  I've been using Hootsuite for about a year now and have found that if I limit my time on twitter to about 15 minutes, I can schedule tweets and continue twitter conversations without wasting unnecessary amounts of time that could be used doing something more productive.  #personal #professional

4. Google Forms
Gathering information is a time consuming practice.  In the classroom, Google Forms is a time saver for sharing and collecting information from students and parents.  Whether a simple parent survey or a complex student assignment, Google Forms are easy to build and all the information is compiled into a spreadsheet in your Google Drive.  #professional

5. Spotify
I enjoy playing music in the background to fit my mood and to help me complete my tasks... upbeat playlists for when I need an extra pep in my step or instrumental scores for when I need to slow things down.  Although spotify is not a 'time management' app, it's organized playlists and easy search features make it my go-to mobile jukebox.  Oh, and its free! #personal #professional

Monday, January 12, 2015

Communicate 4.3.1 The Synchronous Session

[Image Source]

I've mentioned in previous posts my experience as a student in an online gifted endorsement.  While I thrived in the asynchronous discussion forums and enjoyed the autonomy of the course work, I especially came to appreciate and look forward to the weekly small group synchronous session.   I learned from my experience that although a virtual course is a distinctly individual environment, interaction through synchronous sessions is necessary to maintain a "true classroom culture."

Simply put, the synchronous session is the human element of a virtual classroom.  Any teacher's goal is to create a community of learners and the synchronous session is the medium in which a virtual teacher builds such a community.  Whether a meeting with students to discuss a topic or open office hours where students and parents can ask questions and receive real-time answers, the synchronous session is a most valuable component of an online classroom.

Communicate 4.2.3 Discussions


In the online classrooms, discussion forums serve a very important purpose.  They are not only a place for students to engage with one another about a topic of study, but also a place for teachers to evaluate student understanding.  In my own experience taking online courses as part of my gifted endorsement, I found the discussion forum to be extremely effective.  From a student's perspective, the weekly discussion was an opportunity to share my ideas and more importantly to gain a deeper understanding of the topic by reflecting on the ideas of my peers.

Because students are able to gain a more insightful understanding, the discussion forum functions as one of the most important teaching tools in a virtual instructors toolbox.  Yet, the discussion can be used ineffectively.  For example, students may post comments that are too simplistic and do not further engage their peers in the conversation.

To avoid this type of behavior and to make the forum as effective as possible, virtual teachers can adhere to a few best practices for facilitating an online discussion.  The most crucial best practice is clearly communicating the discussion expectations from the beginning.  Students should know the rules for good forum conversation (ie: how to appropriately disagree with someone) and should be given a rubric.  Another best practice for the online teacher in facilitating discussions is to encourage learners to dig deeper and continue the conversation by identifying connections and posing open ended questions.

In all, discussions are a necessary and essential element of the online course.  A virtual teacher must become an effective facilitator who maintains an obvious presence while building a collaborative environment in which students take the lead.

Communicate 4.2.2 Digital Feedback

Feedback is an essential part of any classroom.  For the virtual teacher, feedback must be specific and personable in order to enhance the experience of students.  The digital resources below are excellent additions to the virtual teachers toolbox, especially as a means to provide the feedback students need to be successful in an e-learning environment.

No. 1 Audio Feedback using Evernote
I was first introduced to Evernote a couple of years ago at an EdTech Conference.  I was immediately drawn to its promise to make my life more organized and to be the workspace to get everything done.  My Type A personality was buzzing as I downloaded the app as fast as I could open the iTunes store.

Since then, I have not utilized Evernote as much as I imagined I would... but I am excited about the new prospect of rediscovering it as a means to deliver feedback as a virtual teacher.  Upon reading about 'Speaking to Students' with audio feedback in Online Courses, I was especially intrigued how teachers can email an audio note to students.  This is an excellent resource for giving personable and individualized feedback to students and I am looking forward to trying out this Evernote feature.

[Image Source]


 No. 2 A Kudos & Challenges Email using Mail Chimp
A few posts ago I showcased Mail Chimp for creating beautiful email newsletters to maintain ongoing communication [Read the post here].  I am excited to share another example of how a virtual teacher can utilize Mail Chimp to send out summative feedback to all students with a special focus on discussion forums.

I love the idea of sending an email to students to give kudos for great posts and participation.  This not only calls out awesome work of students, but gives other students an example to emulate.  Students will naturally be inclined to engage at a deeper level.

View this email live: http://eepurl.com/bbafcD

Note: The graphics I used as part of this template were created in canva!

No. 3 Creating images for an Excellent Job using free Meme Makers
Just as effective as sending a mass email to identify and praise students' hard work, virtual teachers should communicate praise-worthy feedback individually.  Free meme makers on the internet are a great way for teachers to bring some humor and personality into their feedback.

Memes can be created very quickly and infinitely individualized.  What's even better, memes are part of our students' digital culture and they make immediate connections to the messages.  It is for this last reason, making relevant connections to students' lives, that I believe memes can be a powerful tool for giving personable feedback in the virtual classroom.

Below are a sampling of memes I created to showcase how they can be used to give feedback.  In my own classroom, I would attach/embed these into an email I was sending to the student discussing their great work!  I would even cc the parent as an added emphasis of praise!

Communicate 4.2.1 Feedback

To introduce my students to the Historical Thinking Skills as part of the newly redesigned AP US History course, I created an 'About Me' Project.  Assigned on the first weekend of school, this project was a perfect opportunity for students to explore the skills that would serve as the foundation for the course and to introduce themselves to me in a creative way.

The project description is below, as well as the images, documents, sample project presentation, and rubric that I used to introduce the project to my students.

 Historical Thinking Skills- An About Me Project


Task: Your task is to create an ‘About Me’ presentation within the context of the APUSH Historical Thinking Skills.  This project will count as a Period Assessment.

Your project must be created as a Google Drive Presentation & shared with me- mrscricketbutler@gmail.com- by the due date: Monday-08.18.14 at 8:10 am

You must provide an example from your life for each of the following skills:
1. Historical Argumentation
2. Appropriate Use of Relevant Historical Evidence
3. Historical Causation
4. Patterns of Continuity & Change over time
5. Periodization
6. Comparison
7. Contextualization
8. Interpretation
9. Synthesis


Historical Thinking Skills About Me Project--Grading Rubric:
adapted from Mitch Billings, Catholic High School, Louisiana

9=Filet Mignon: from the first taste to the last bite it is excellent—consistent—no bad moments.  There are “oohs” and “aahs” at each bite.
8=New York Strip: Very good—fairly uniform with just a rim of “fat.”  Tasty and a great steak.
7=T-Bone: Good!  But there is a part of it which is excellent—the small part—the “filet”--and the other larger part is fairly consistent.
6=Chicken Fried Steak: Better than a burger—actually it IS sort of a burger with a little trimming on it.  The meat is rather “pedestrian” with a little “seasoning” to help it.
5=Hamburger: Adequate—OK—filling—a “sameness” about them (however, if you kissed your girlfriend/boyfriend and she/he said it was “adequate,” would YOU be satisfied?
4=Hot Dog: By itself, it isn’t much.  It needs “dressing up” with chili, mustard, onions to make it palatable.  It has the APPEARANCE of something good, but fails to deliver unless it is augmented by condiments.
3=Vienna Sausage or Baloney Sandwich: the ingredients are a mixture of the good, the bad, and the ugly.  You wouldn’t leave the house to go out for a baloney sandwich, would you?  We’re into survival food here—you have nothing else.
2=Spam: down to hurricane rations.  A great mish-mash of all sorts of things—some not good.
1=Potted Meat: We have NO IDEA what’s in it—perhaps everything and nothing—a last ditch effort.

The last three come in CANS—YOU HAVE TO DIG FOR IT!

NOTE: For a grade of 9/9, you must provide a creative and thoughtful example for each of the 9 Historical Thinking Skills.  You are also expected to give a detailed explanation for each example in the notes section for each slide (see my example in the HTS folder).

 A Note on the Rubric: Because the project was designed to take one of the foundational elements of the course and explain it using creativity within the context of my students' lives, I wanted the rubric to reflect the same theme.  To illustrate my expectation of creativity for this project, my rubric encouraged students to produce a fun and informative product. 

  A Note on the Commentary:  Below are examples of the commentary I provided for students on their HTS 'About Me' Projects.  All student samples are used with permission and feedback was given based on the rubric above.  I made it a personal quota to comment on at least 2-3 individual slides within each student's presentation, as well as giving them feedback on their overall project grade.


Below are all of the HTS About Me Project links: